Configure your IoT device
Step1
Create an account in iot.webservice.lk if you do not have one yet by simply clicking on Sign Up.
Step2
Sign In to iot.webservice.lk with your email & password after registration process completed. Now you can get your APY KEY, CLIENT ID & CLIENT SECRET from your profile section.
Step3
From My Devices page you can create devices for your Smart Home by clicking on the New Device button and filling the information.
Step4
Now you can prepare your NodeMCU borad (Or Any IoT development borad) with Arduino IDE to upload the programme. Use this (link) to download the sample programme for NodeMCU development borad. D1 pin is used to control the relay module in this programme.
Change below lines in the programme to match with your information in the iot.webservice.lk web portal.
#define MyApiKey "Your_API_KEY" // Change to your webservice.lk API Key.
#define MyDeviceId "Your_Device_ID" // Change to your webservice.lk API Key.
#define MySSID "Your_WiFi_SSID" // Change to your Wifi network SSID
#define MyWifiPassword "Your_WiFi_Password" // Change to your Wifi network password
Step5
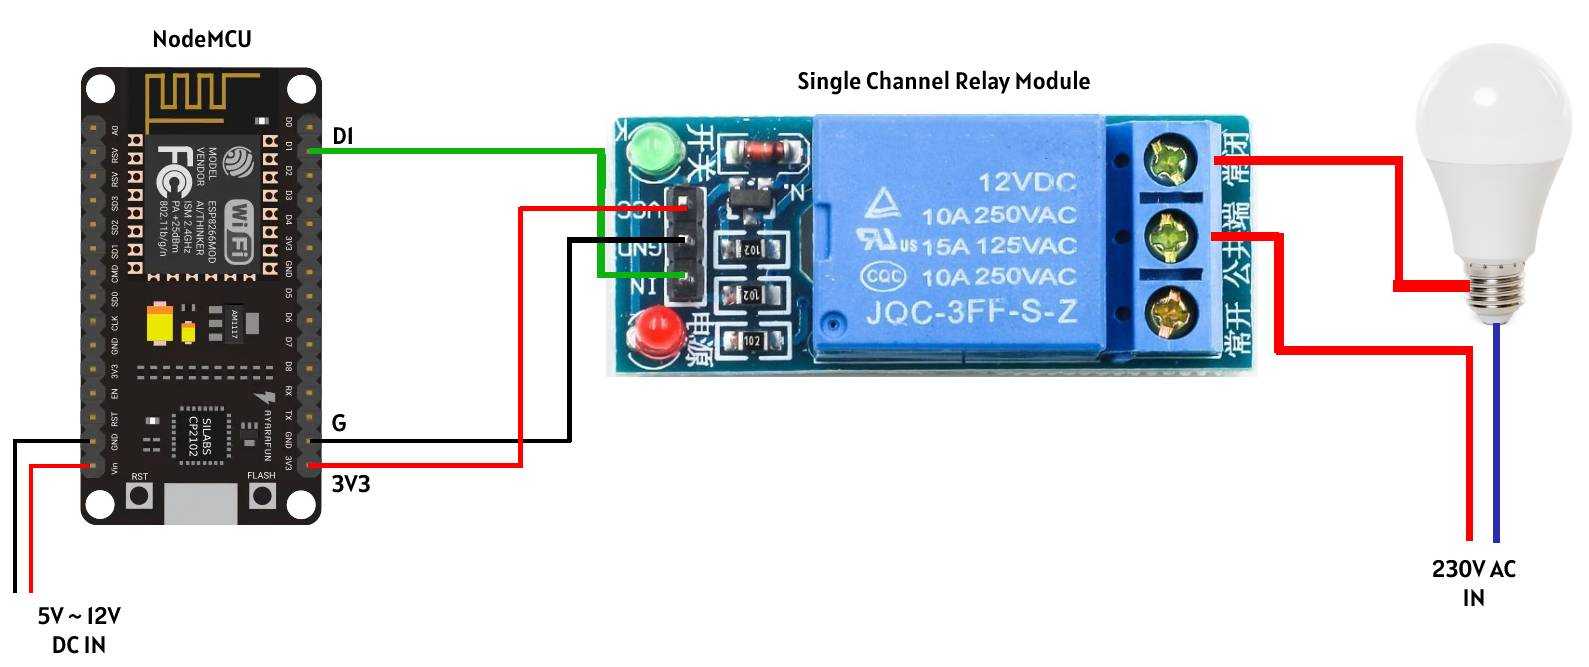
Build the circuit, upload the code and enjoy using it !!!!
Now you can control your connected device through iot.webservice.lk web portal from anytime, anywhere with the internet.
Copyright © 2022 iot.webservice.lk. All rights reserved.