Connect with Amazon Alexa
Amazon Alexa provides a Smart Home API for richer home automation control without requiring the user to say the skill name, such as:
“Alexa, turn off the light.”
“Alexa, set the thermostat to cool.”
“Alexa, is the garage door open?”
Steps to Integrate an Amazon Alexa Smart Home Skill with WebServiceLK-IoT
Step1
Follow the steps in Configure IoT Device page and make sure your device is working properly with WebServiceLK-IoT platform.
Create an Amazon Alexa Smart Home Skill
Step3
Sign into the Alexa Developer Console, you can create your free account on the sign-in page. Note this must be created with the same Amazon account you use on your Alexa devices and app.
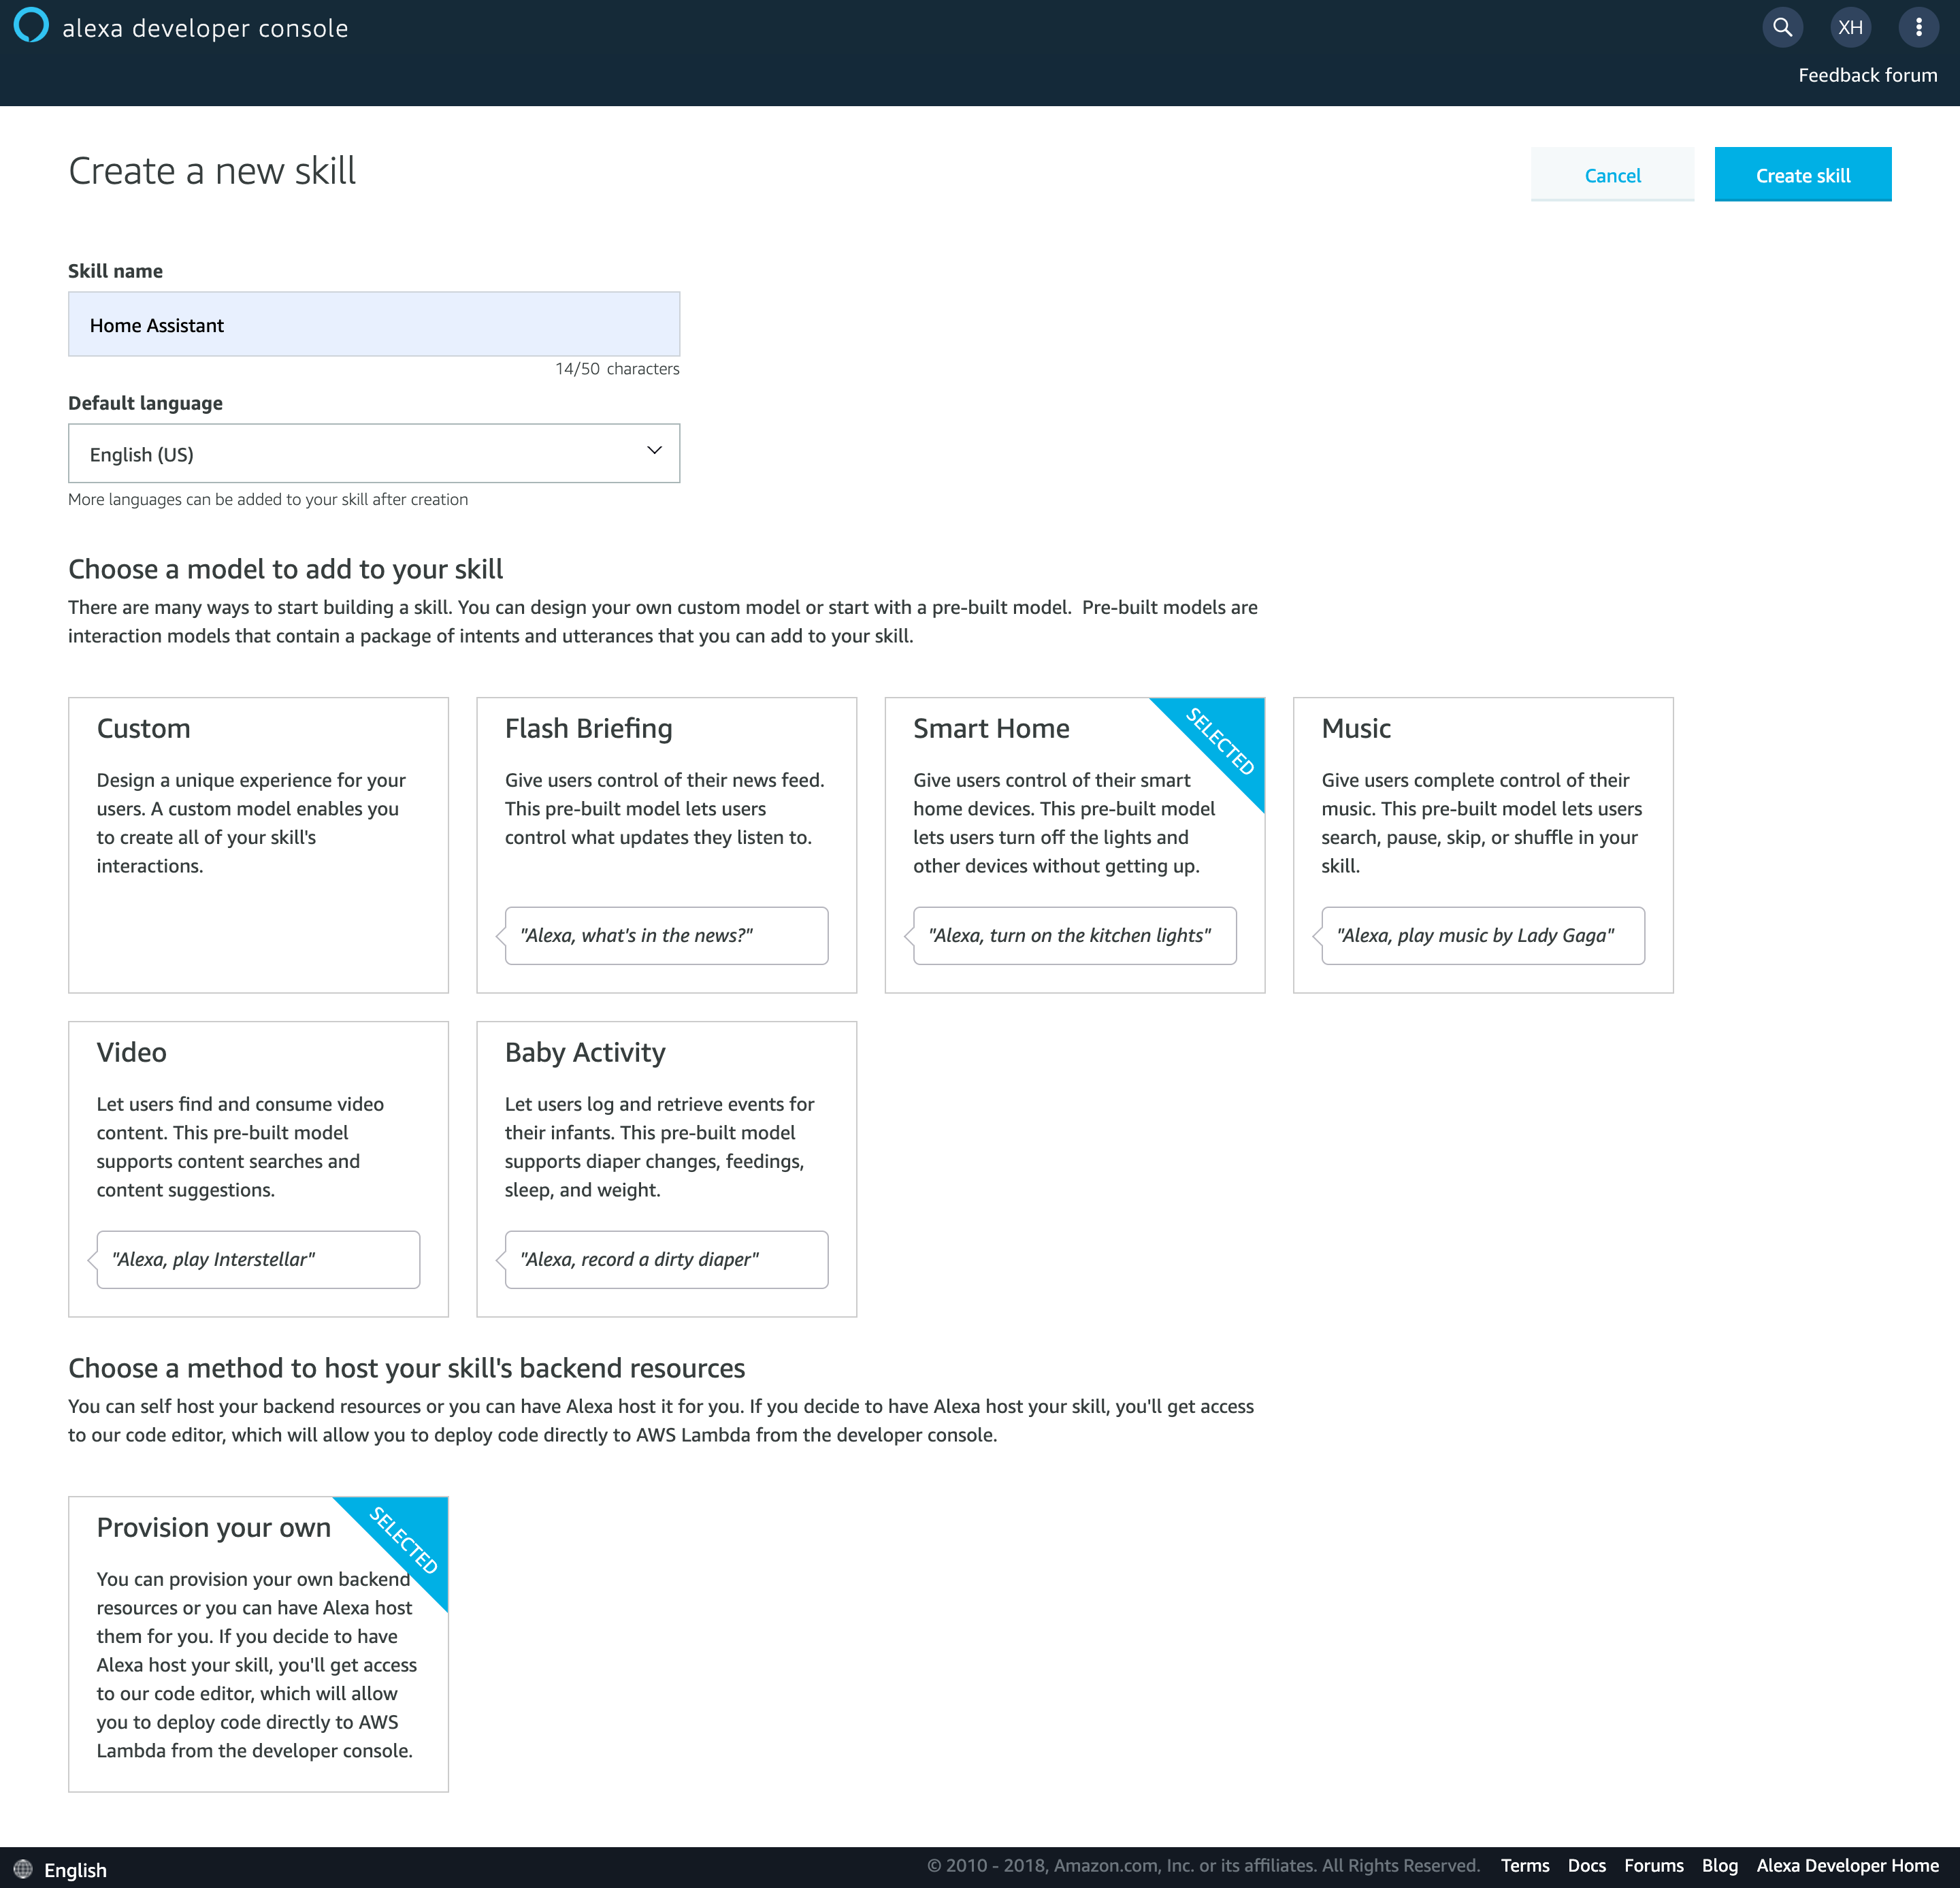
- Go to Alexa Skills page if you are not, then click the Create Skill button to start the process.
- Input Skill name as you like, then select your skill’s Default language.
- Select Smart Home and Provision your own, then click Create skill button at top right corner.
- In next screen, make sure v3 is selected in Payload version and take note of your Skill ID
- Now, you have created a skeleton of Smart Home skill. In the next step we will do some additional work. Keep Alexa Developer Console open, we will need to change the skill configuration later.
Create an AWS Lambda Function
Step4
The first thing you need to do after signing into the AWS console is to create an IAM Role for Lambda execution. AWS has very strict access control, so you have to specifically define and assign the required permissions.
- Click Services in the top navigation bar, expand the menu to display all AWS services, then under the Security, Identity, & Compliance section click IAM to navigate to the IAM console. Or you may use this link
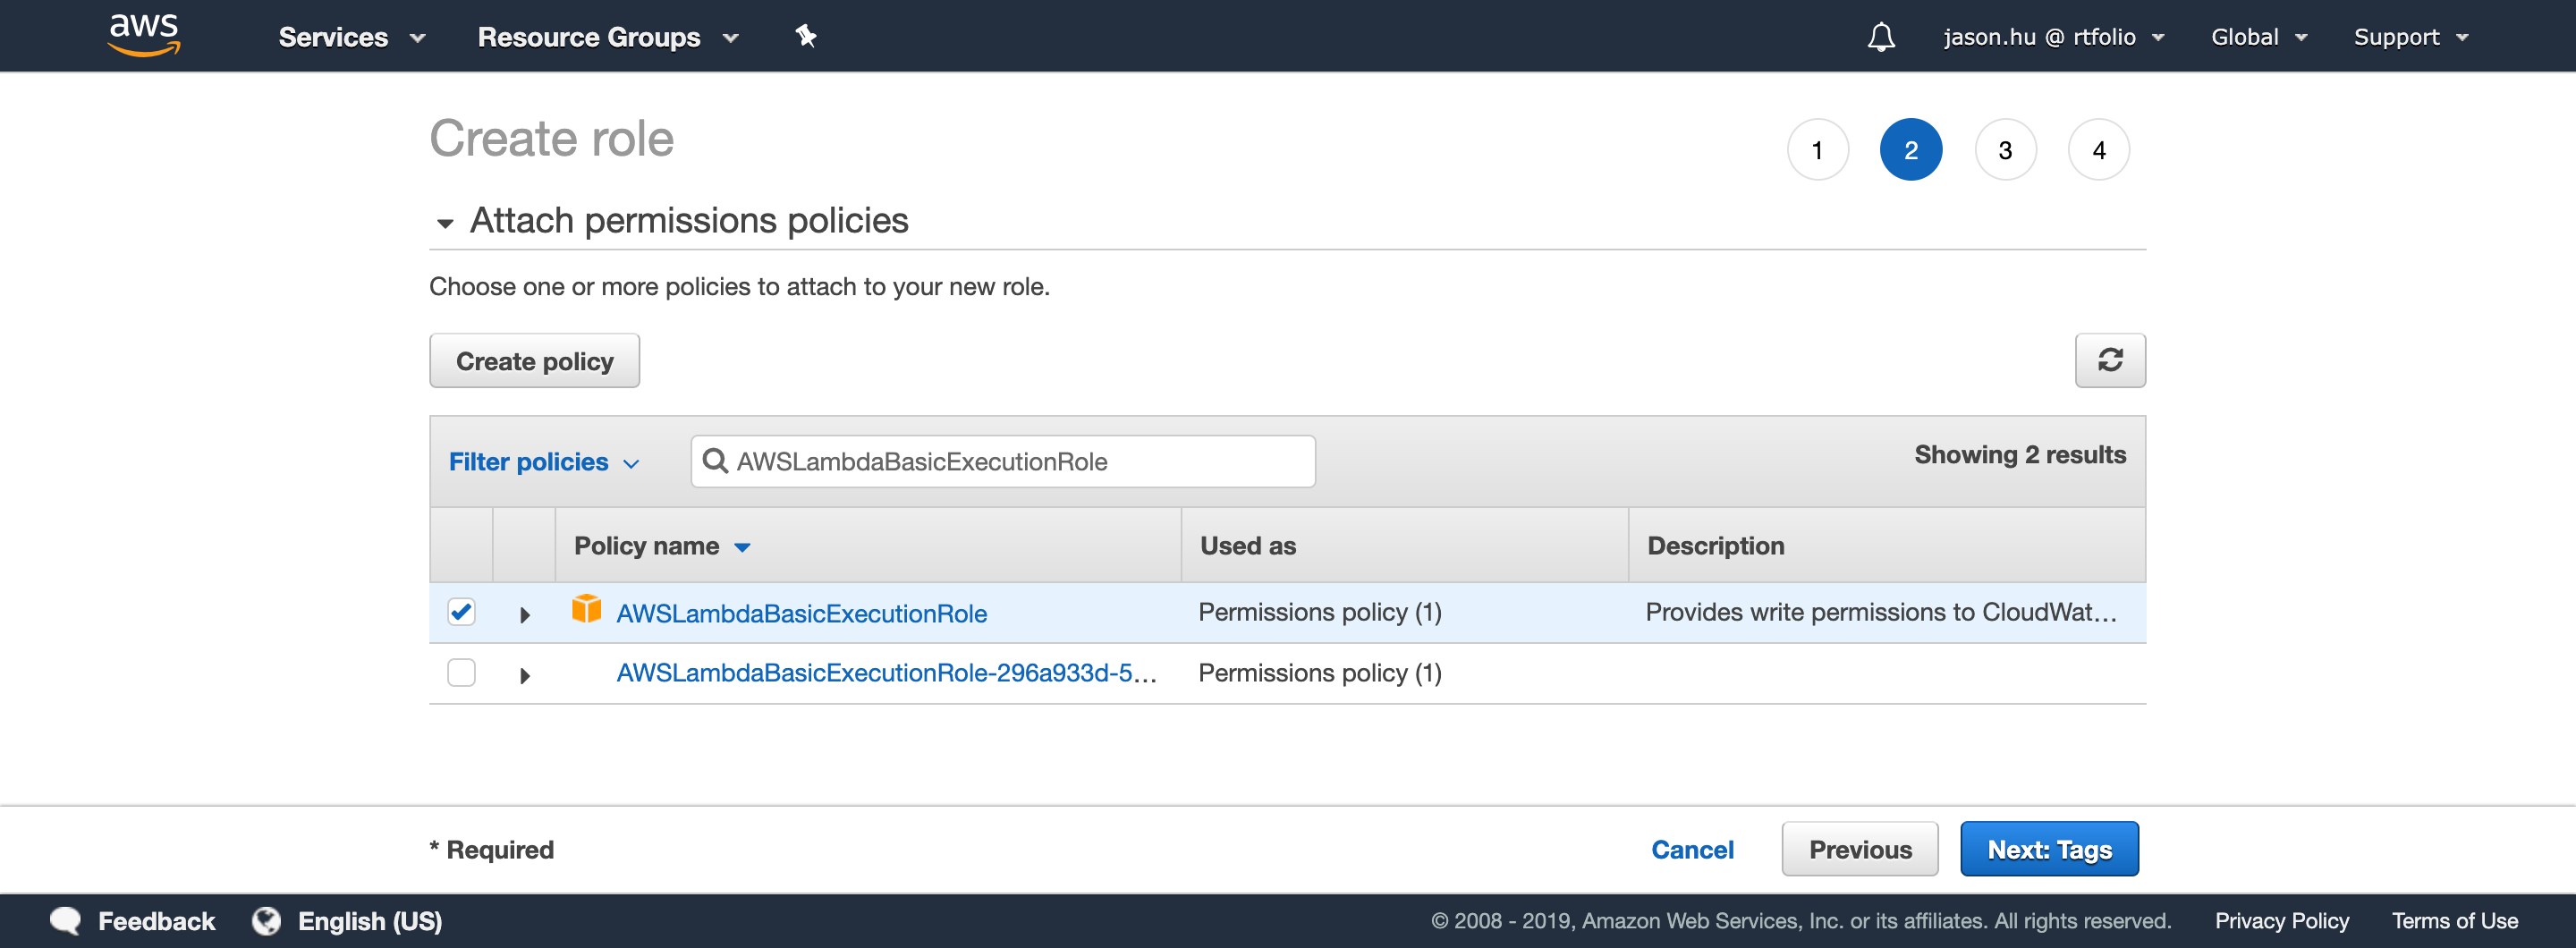
- Click Roles in the left panel, then click Create role, select AWS Service -> Lambda in the first page of the wizard, then click Next: Permissions
- Select AWSLambdaBasicExecutionRole policy, then click Next: Tags. (Tips: you can use the search box to filter the policy)
- Give your new role a name, such as AWSLambdaBasicExecutionRole-SmartHome, then click the Create role button at the bottom of the pahe. You should be able to find your new role in the roles list now.
Add Code to the Lambda Function
Step5
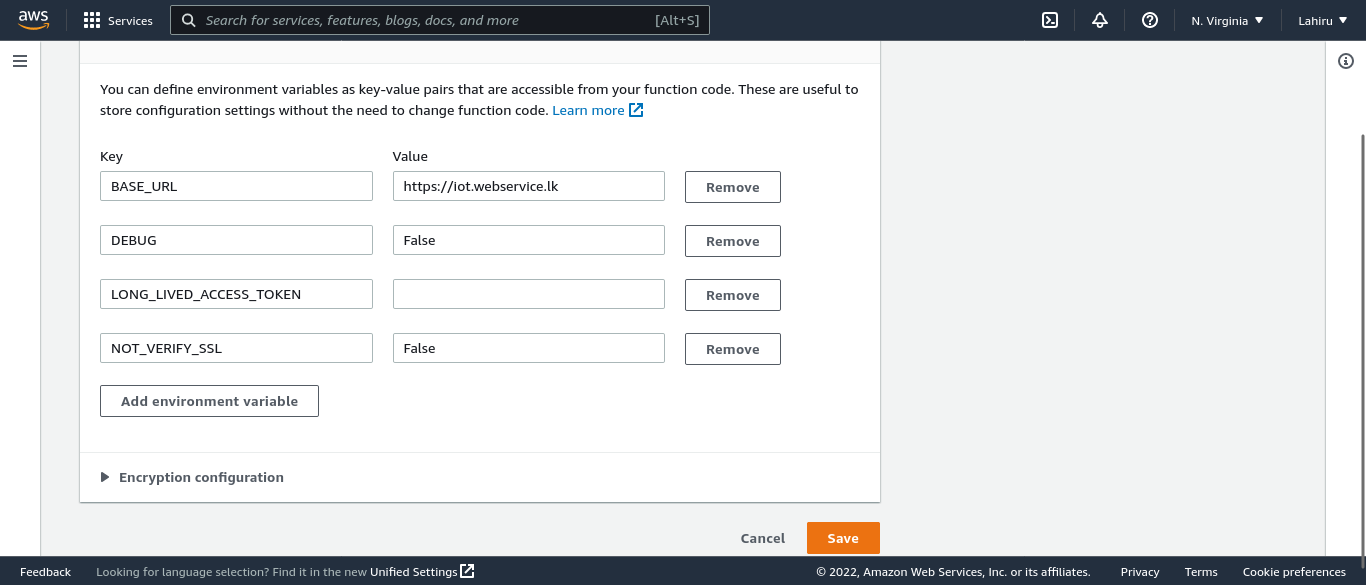
you need create a Lambda function.
BASE_URL : https://iot.webservice.lk
DEBUG : False
NOT_VERIFY_SSL : False
LONG_LIVED_ACCESS_TOKEN : [Keep Empty]
Configure the Smart Home Service Endpoint
Step6
Now navigate back to the Alexa Developer Console. You will finish the configuration of the Smart Home skill and go to Alexa Skills page if you are not.
- Find the skill you just created, click Edit link in the Actions column.
- Click SMART HOME in the left navigation bar of build page.
- Fill in Default endpoint under 2. Smart Home service endpoint using the ARN you copied from your Lambda function configuration.
Account Linking
Step7
Alexa needs to link your Amazon account to your WebServiceLK-IoT. Return to the Alexa Developer Console, go to Alexa Skills page if you are not.
- Find the skill you just created, click Edit link in the Actions column.
- Click ACCOUNT LINKING in the left navigation bar of build page
- Input all information required.
Authorization URI: https://iot.webservice.lk/oauth
Access Token URI: https://iot.webservice.lk/token
Client ID: [Client ID from WebServiceLK-IoT - From your profile]
Client Secret: [Client Secret from WebServiceLK-IoT - From your profile]
Your Authentication Scheme: HTTP Basic (Recommended)
Your Authentication Scheme: HTTP Basic (Recommended)
Your Rdirect URLs: https://iot.webservice.lk
Scope: user
Default Access Token Expiration Time: 3600
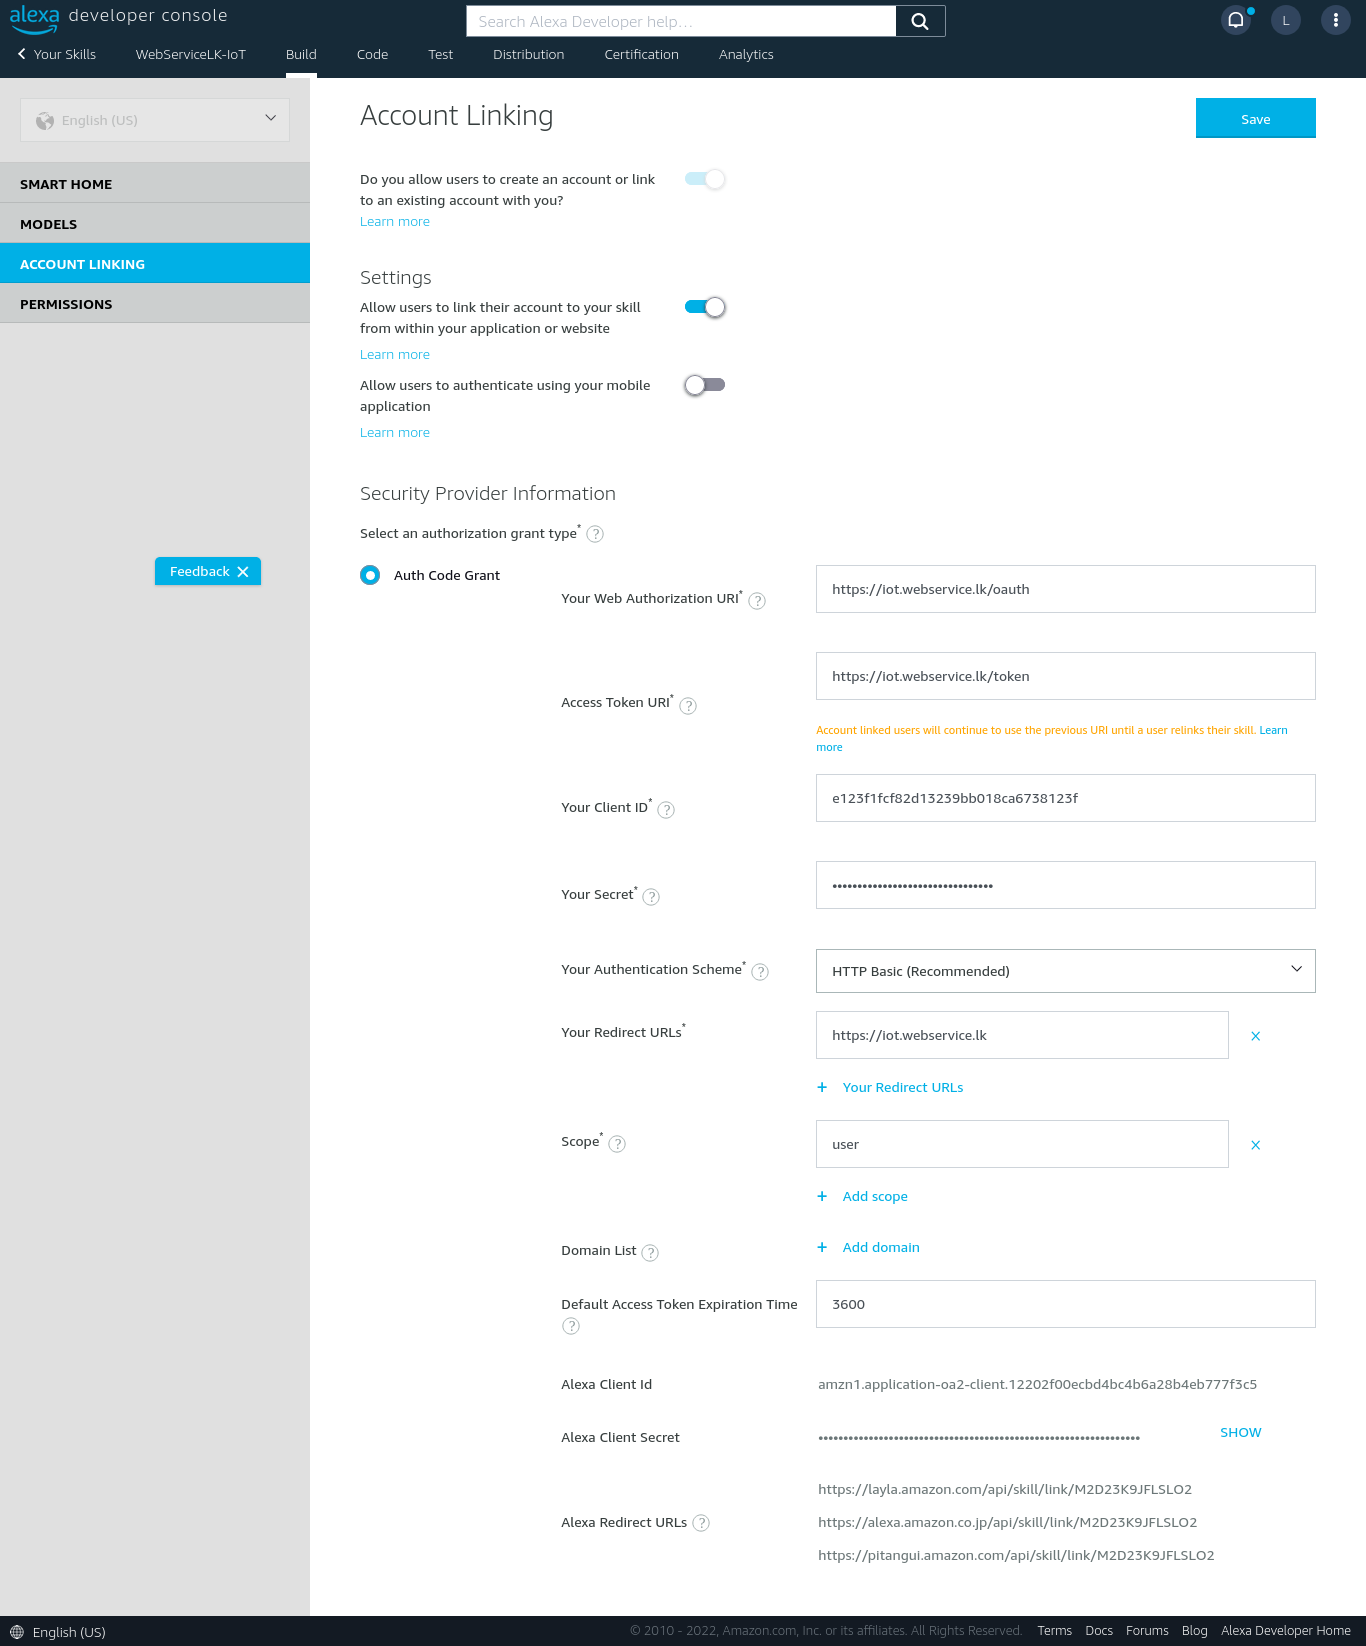
- Click Save button in the top right corner.
Use alexa Mobile App or Alexa web-based App
Step8
Next, you will use the Alexa Mobile App or the Alexa web-based app to link your account.
- In the Alexa app, navigate to More -> Skills & Games -> Your Skills -> Dev Or In the Alexa web app, navigate to Skills -> Your Skills in the top right -> Dev Skill
- Click ACCOUNT LINKING in the left navigation bar of build page
- Click the Smart Home skill you just created.
- Click Enable to use
- A new window will open to direct you to your WebServiceLK-IoT’s login screen. Put your credentials as you registered and Login.
- After you successfully login, you will be redirected back to the Alexa app.
- Alexa should automatically start discovering your devices now! This is indicated by a blue ring on your physical devices. If not, ask Alexa to Discover Devices
Now, you can ask Alexa from your Echo or the Alexa App, “Alexa, turn on bedroom light”
Copyright © 2022 iot.webservice.lk. All rights reserved.